In this issue:
Esthetic Dentistry: A 'Redo' Case
Author


It’s a common scenario: A patient who has previously received anterior restorations is unhappy and consults with you about retreatment. This particular case was typical — the patient felt that her veneers on teeth #7–10 were too short.
The patient showed her “before” photos and explained the original concerns that prompted her initial treatment with the first dentist. After examining her dentition and understanding her desires, I had to ask myself the critical question, “Can I do better?” To confidently answer yes, I must have a specific plan for how my restorations will address the patient’s concerns. In this case, the answer was yes, so I went forward with the treatment planning.
By utilizing a lab-created diagnostic wax-up, I was able to give the patient a preliminary look at the possibilities for her smile makeover, making it possible to review the esthetics together and fulfill her expectations before committing to a treatment plan. In this article, I will take you through the steps I use to get predictable results utilizing a diagnostic wax-up and chairside-milled Obsidian® veneers. I recommend following these steps for the treatment planning of any esthetic case, but especially for patients who want their existing restorations redone, as they may need additional affirmation following a previously disappointing experience. This is a vital process for both the patient and clinician, and doesn’t require you to purchase any special software or other equipment.
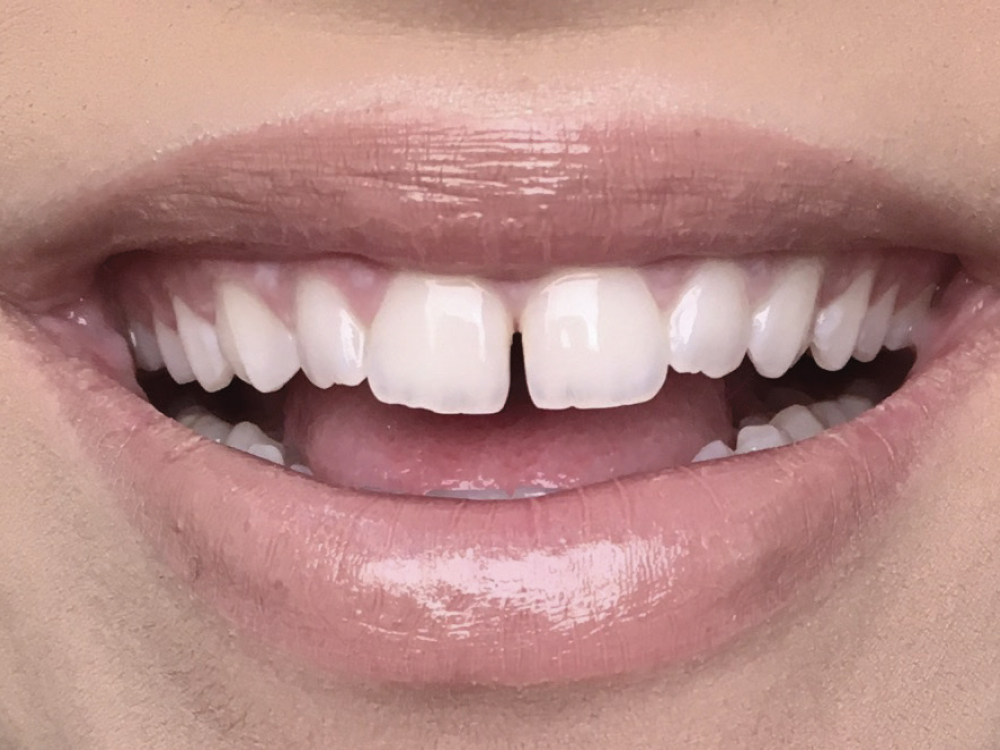
Figure 1: The patient’s smile prior to her initial veneer treatment a few years ago. The diastema between #8 & #9 and the incisal edges of #7–10 were her primary motivations for pursuing a smile makeover.
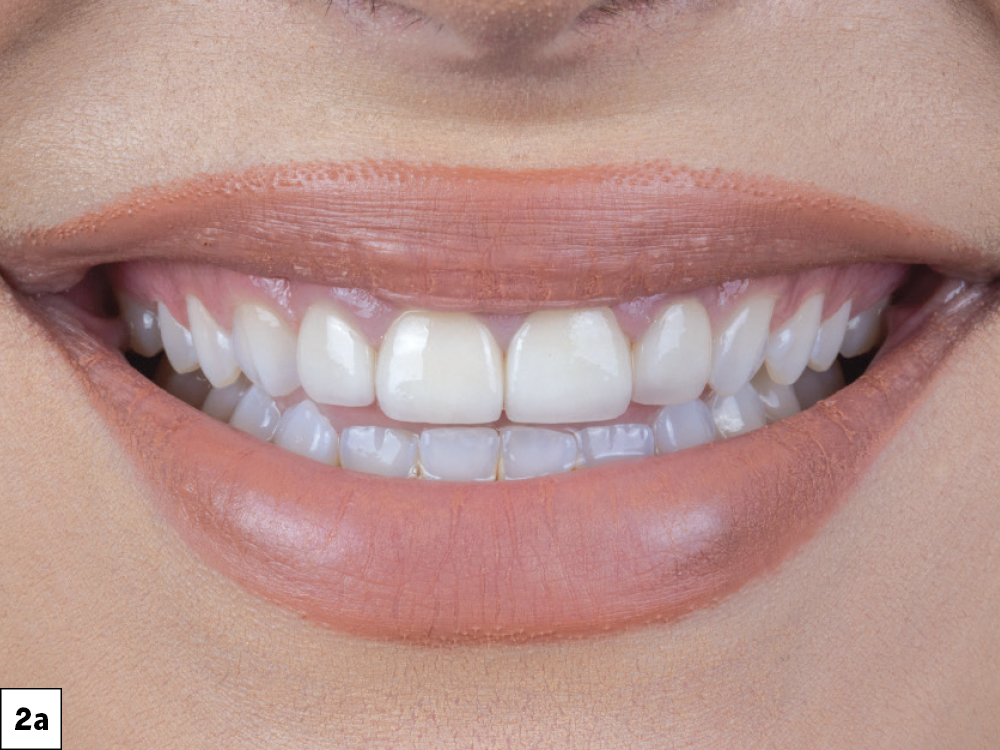
Figures 2a, 2b: After her initial treatment, the monolithic restorations appeared shorter than her natural teeth originally did, eventually prompting her to seek additional treatment with me. In the rest of this photo essay, I will give a step by-step breakdown of how I approach this type of case and what I did to give the patient the restorations she always wanted.
STEP 1:
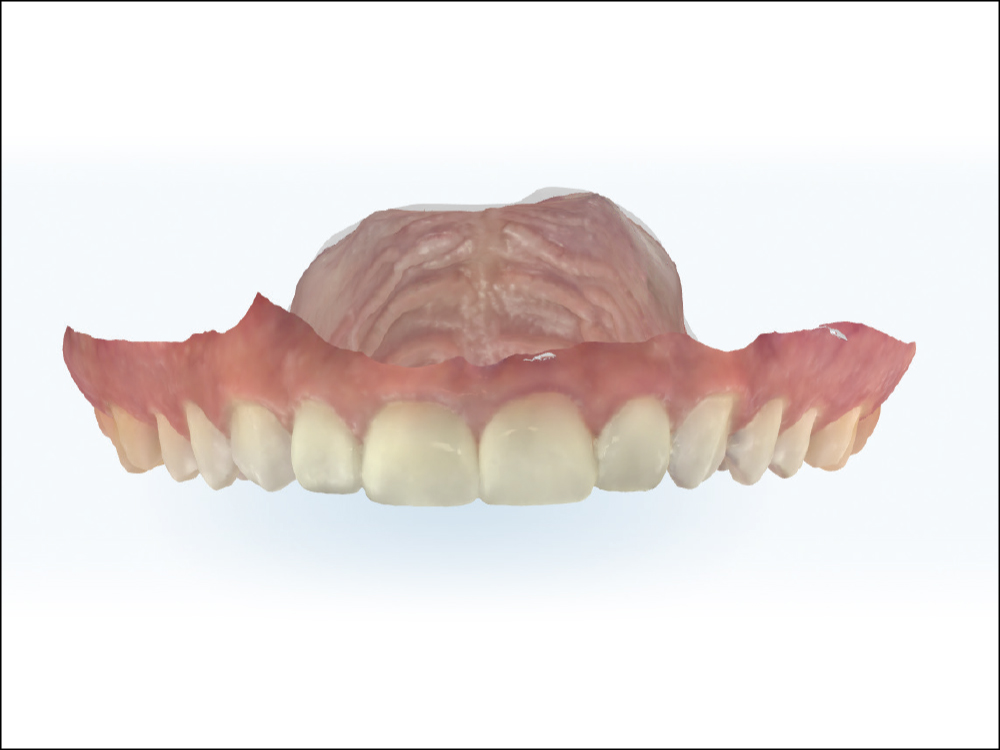
Figure 3: First, take an intraoral scan of the patient’s existing restorations and surrounding teeth. This “pre-scan” serves as a study model and will be used to create a wax-up. Note that the opposing and bite scans also need to be taken. If you do not have an intraoral scanner, VPS impressions and a bite registration are acceptable. Send the scan or the traditional impressions to your lab with an Rx requesting a diagnostic wax-up.
STEP 2:
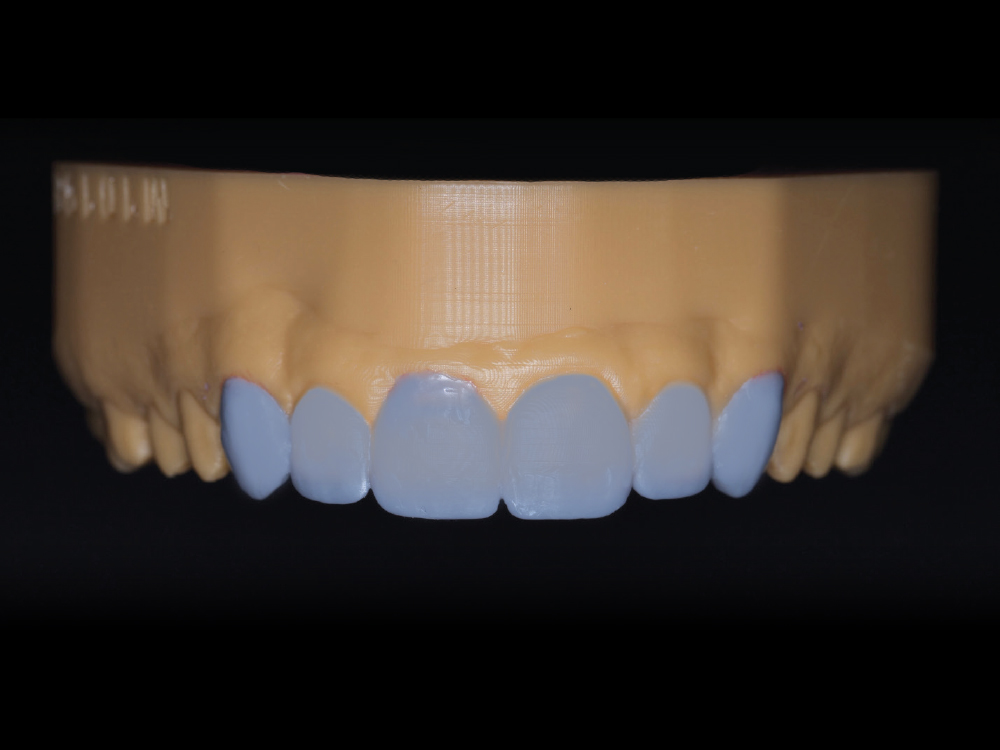
Figure 4: The lab will create a wax-up of the model printed from your intraoral scan or on a duplicate stone model if you used a VPS impression. To establish better proportions in this case, I also decided to add veneers on canines #6 & #11. This wax-up offers the patient and you the opportunity to see how the new restorations will look and function, so that the patient can approve any adjustments you decide to make.
STEP 3:
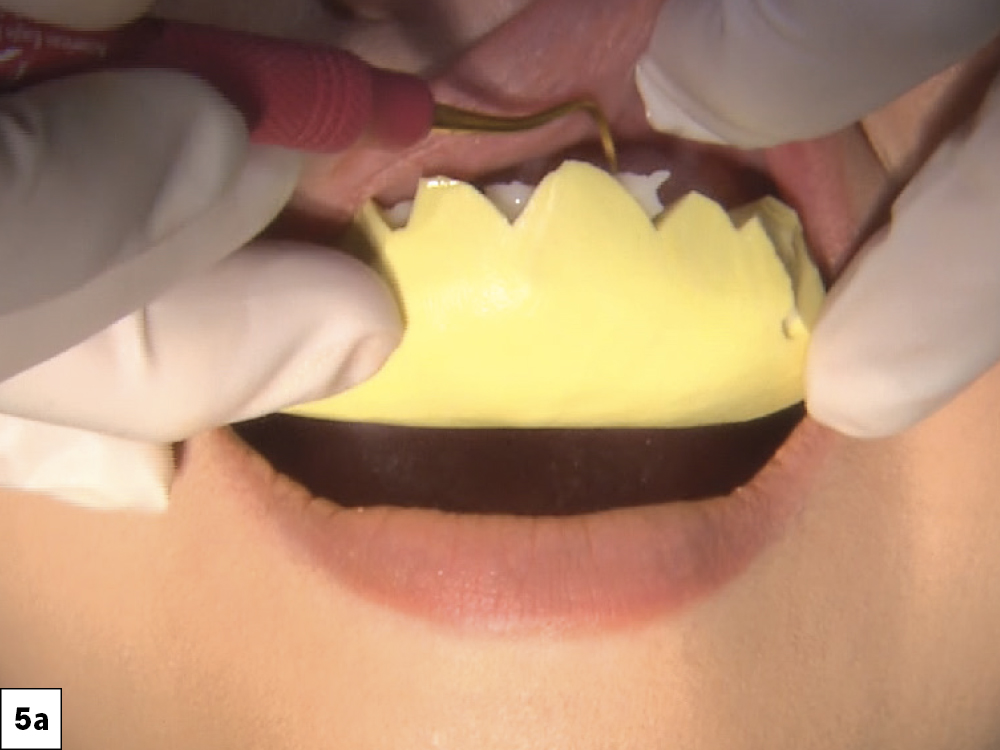
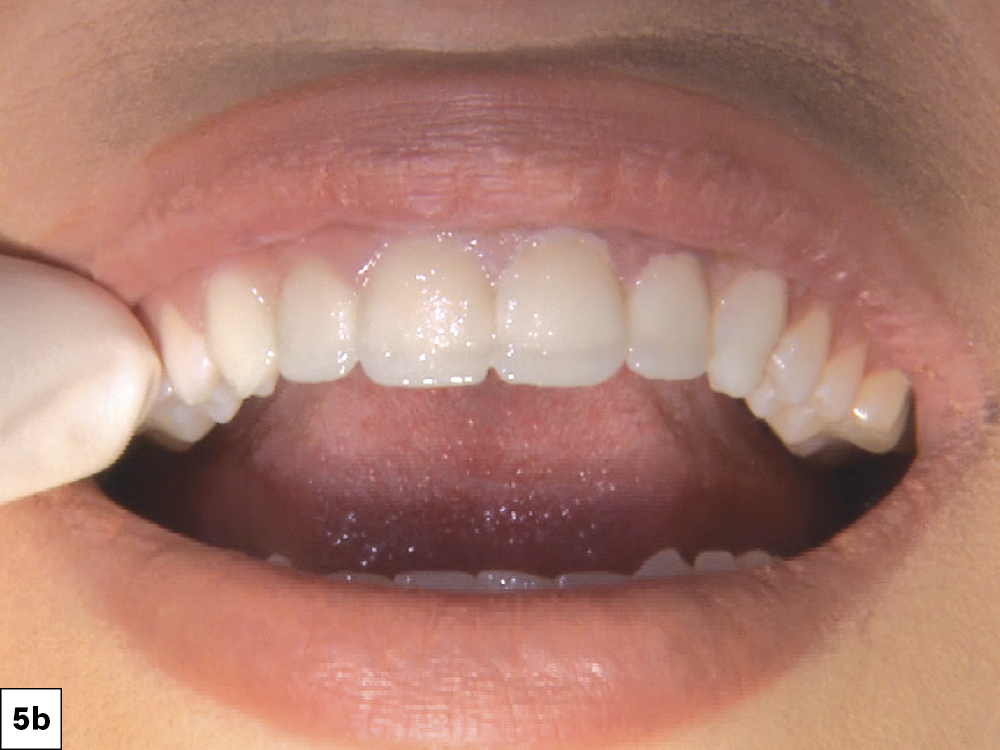
Figures 5a, 5b: When sending the impressions to Glidewell, you will receive a putty matrix along with your diagnostic wax-up case. To preview how the new restorations will look, backfill the putty matrix with bis-acryl and seat it over the unprepared teeth or old restorations. Wait for the acrylic to set and remove the matrix. If any adjustments are needed, you can make the changes directly to the mock-up, but make sure to take a new impression afterward so you can send this impression of the mock-up in place to the lab as a reference.
STEP 4:

Figure 6: Once the esthetics and function are evaluated, proceed with the preparation phase, beginning with the removal of the existing restorations. In this case, I removed the existing four veneers using the Waterlase iPlus® tissue laser (BIOLASE, Inc.; Foothill Ranch, Calif.).
STEP 5:
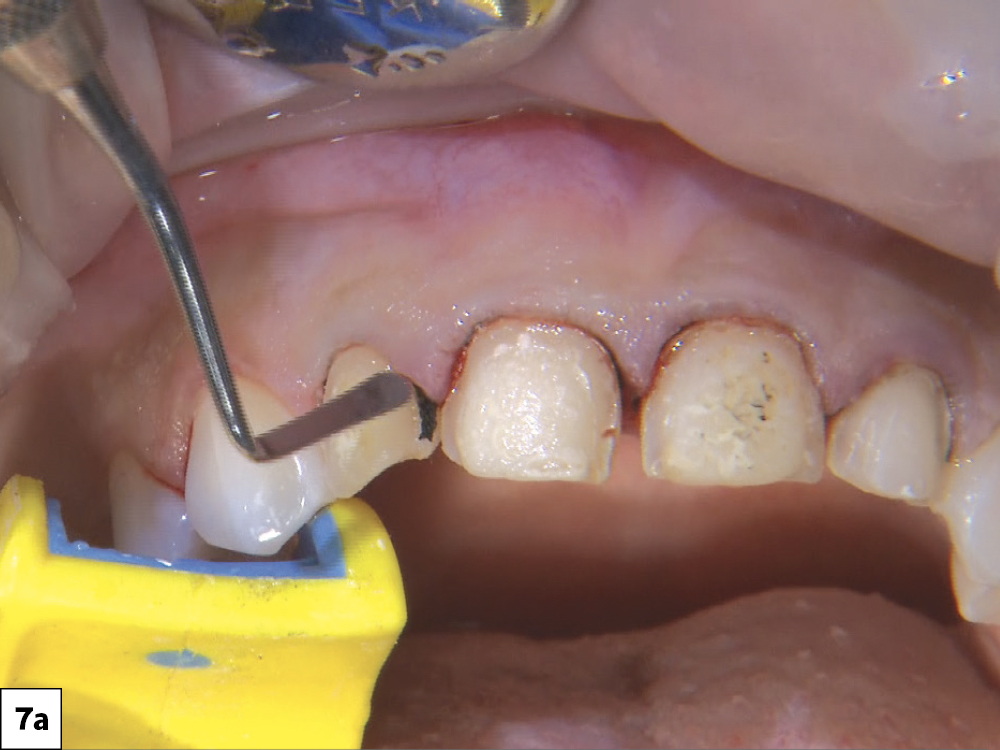
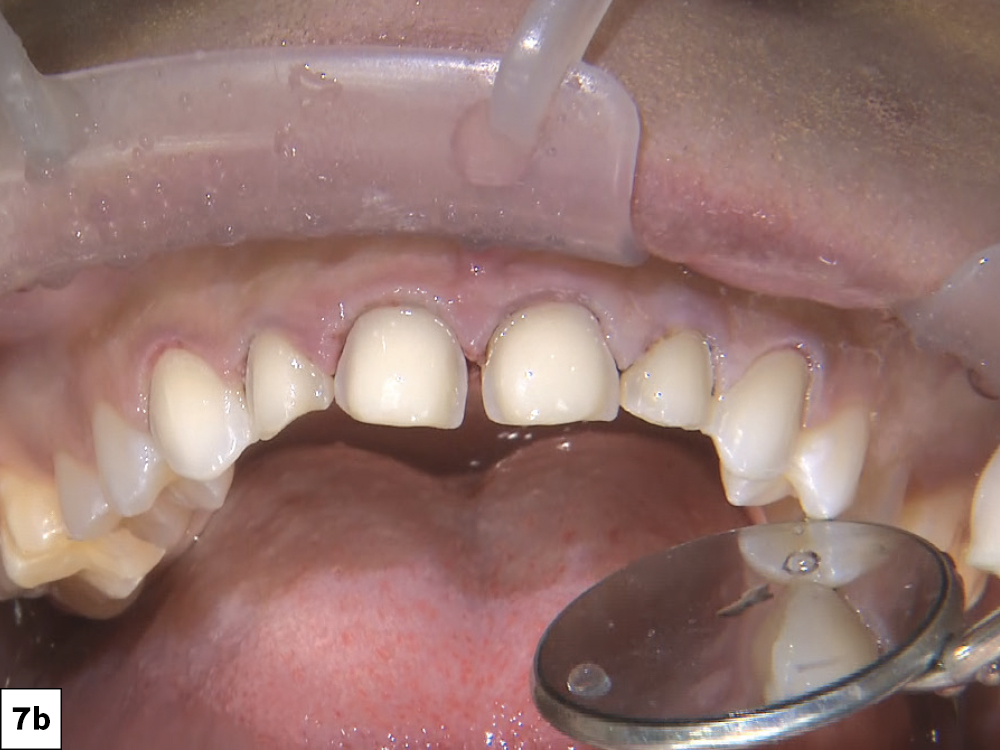
Figures 7a, 7b: After the previous restorations were removed, I placed a fine retraction cord, then refined the preparations for another impression. I used Ultradent Ultrapak® #000 retraction cord (Ultradent; South Jordan, Utah).
STEP 6:
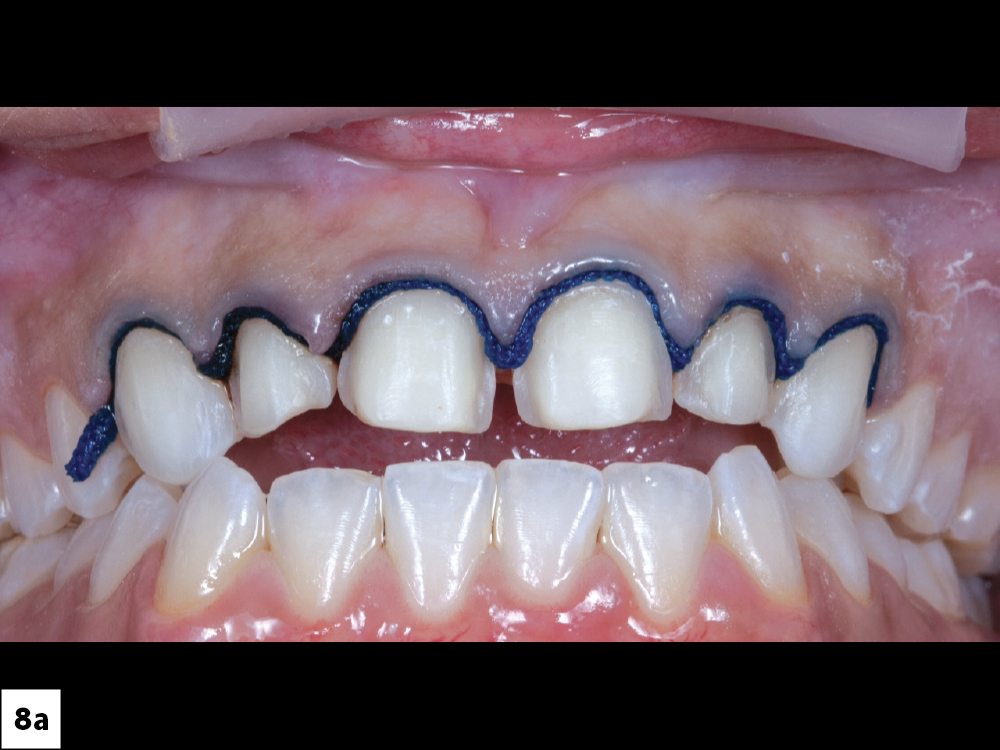
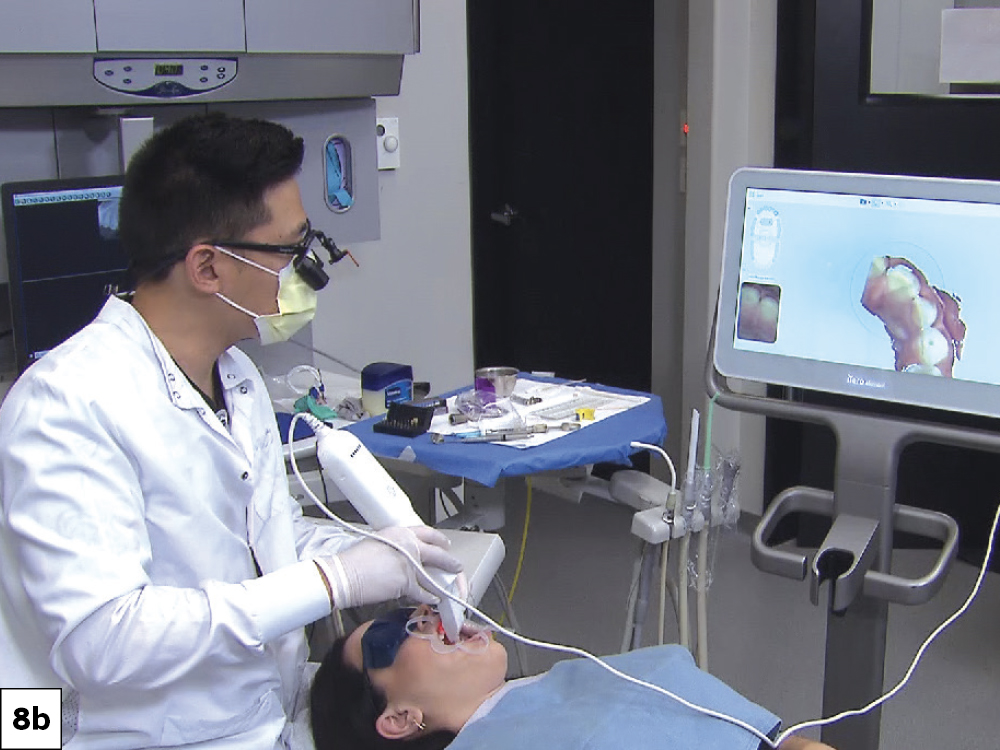
Figures 8a, 8b: For tissue retraction, place a #1 cord and allow it to sit for five minutes before proceeding with the impression. Shown here, I removed the top cord after five minutes and captured the digital impression with the iTero Element® 2 scanner (Align Technology; San Jose, Calif.).
STEPS 7 & 8:
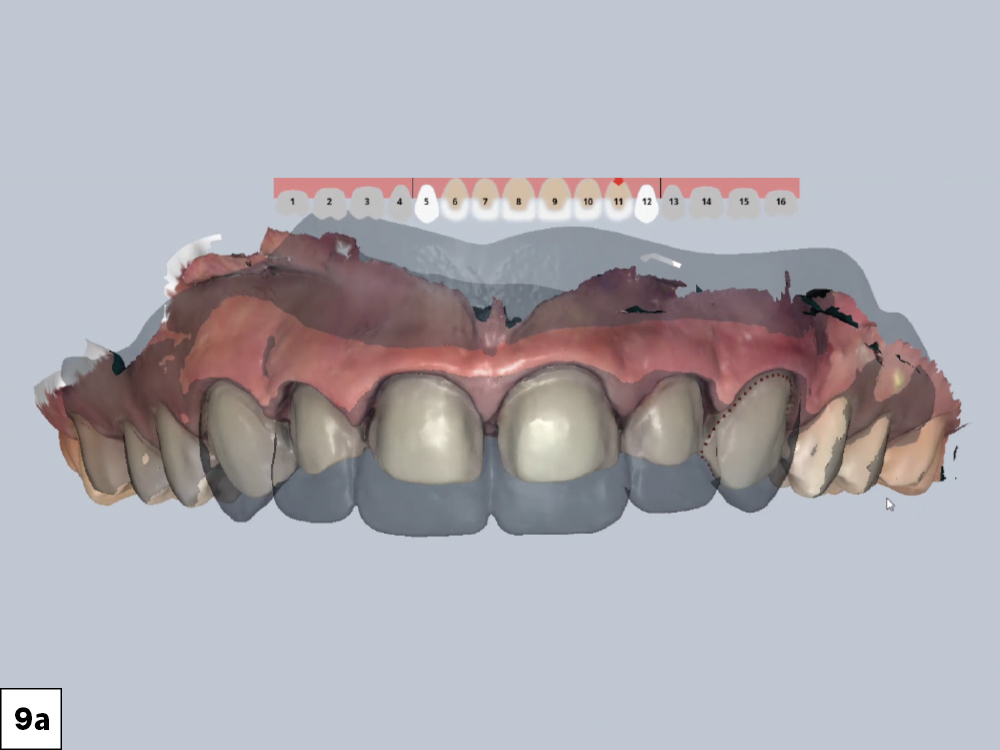
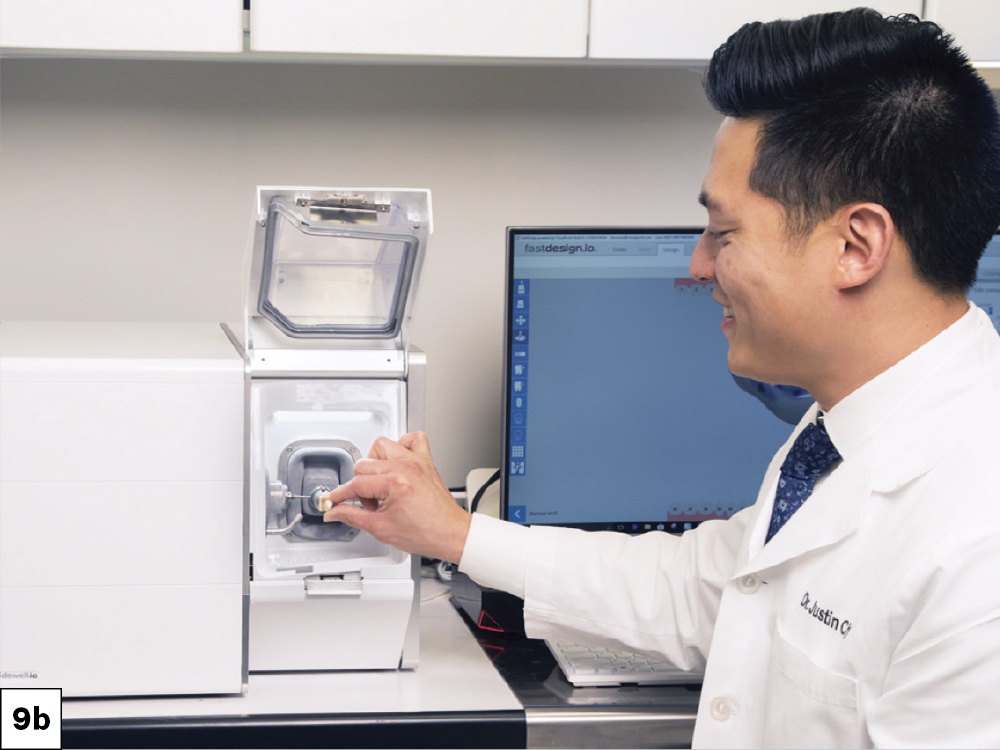
Figures 9a, 9b: For this case, I utilized the glidewell.io™ In-Office Solution to design and mill the Obsidian lithium silicate restorations. The system allows for duplication of the diagnostic wax-up, ensuring predictability of the outcome. Alternately, you can send your impressions to the lab for fabrication along with the impression of the mock-up in place. You can then use the putty matrix to create the patient’s provisionals while you wait for the final restorations from the lab.
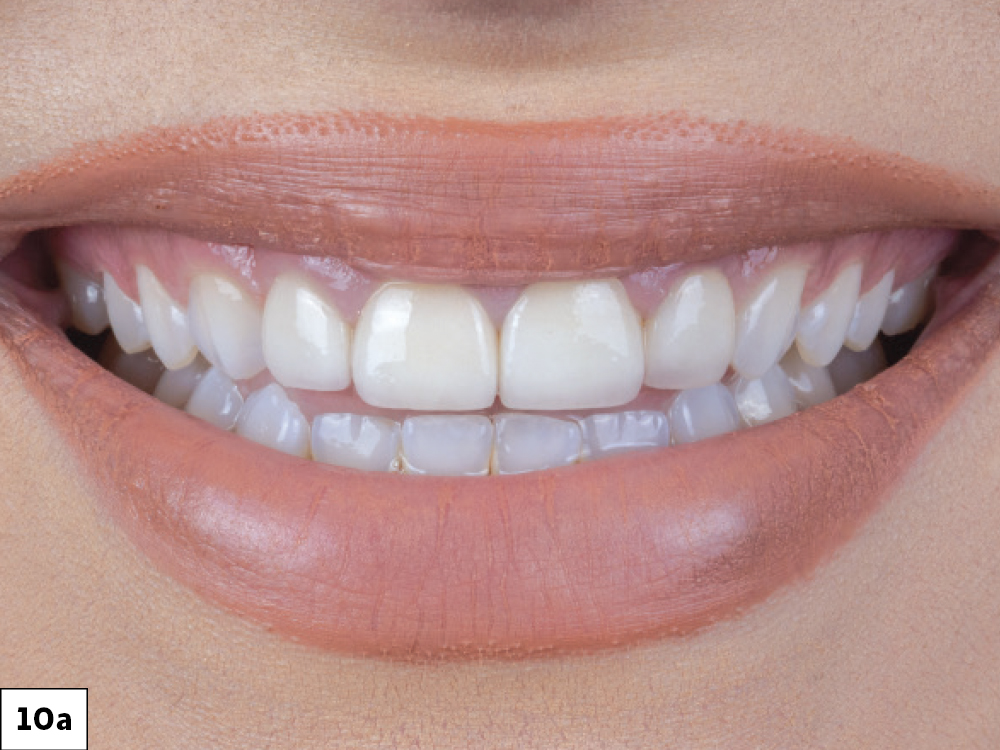
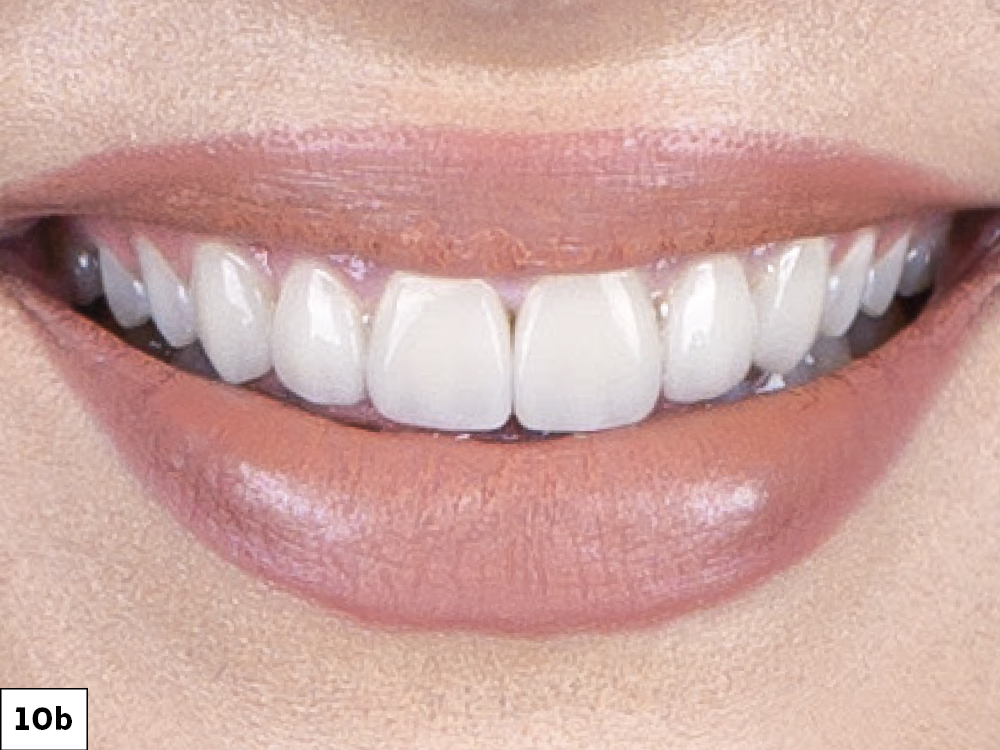
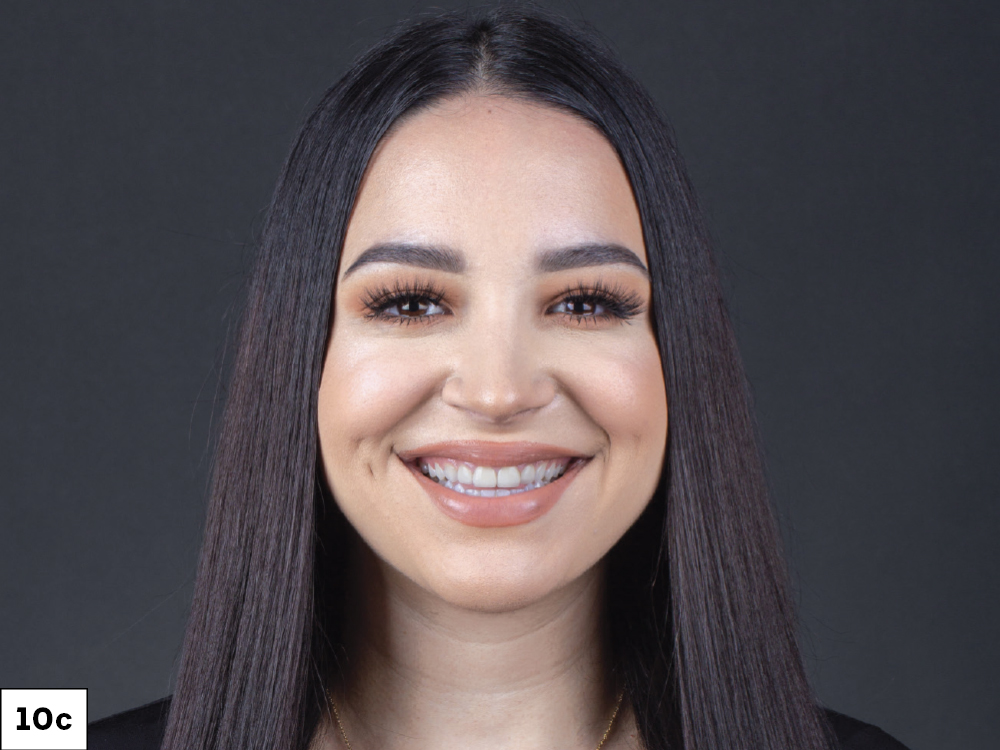
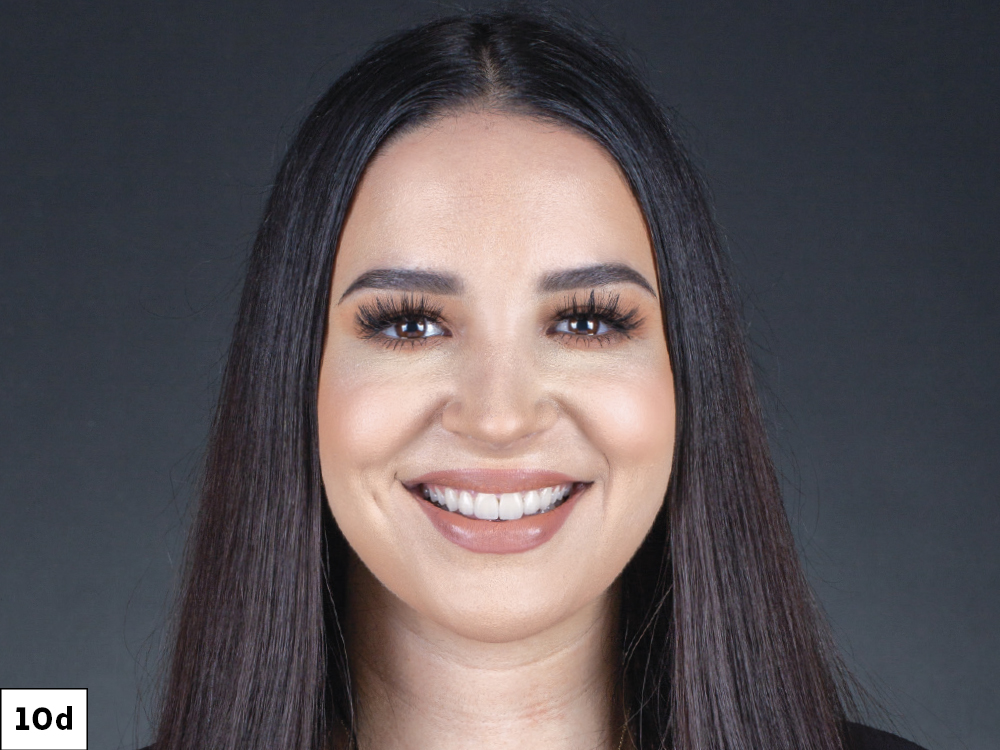
Figures 10a–10d: The veneers delivered in this case perfectly met the expectations of the patient. Allowing the patient to see what the final restoration will look like before committing to a final smile plan will help build trust and confidence in the process. This patient was able to get the results she wanted while being involved in the decision-making process from start to finish.
CONCLUSION
The diagnostic wax-up made by Glidewell was an invaluable tool for this case, and with the glidewell.io system, I had complete control over the design and delivery. The ease of use and efficiency allowed me to provide a next-day delivery of the Obsidian lithium silicate veneers. By following a predictable protocol such as the one I’ve demonstrated here, you will avoid surprises and confidently accept the challenge the next time a patient asks you to redo their restorations.