In this issue:
My Digital Journey: A Story in 3 Cases
Author

A key part of practicing dentistry, as we all know, is serving as an unpaid dental consultant for our friends and family. In this capacity, last year I received a text message from my brother-in-law telling me that he fractured a molar and asking me what could be done. I responded with my plan: “If you cover the lab costs, I’ll fix your molar in two appointments — one appointment for crown preparation with a temporary, and the second appointment two weeks later to cement the crown.
After a while without receiving a reply, I messaged him back asking what his thoughts were. He told me: “Thanks. But no thanks.” He explained that another dentist was able to place a final crown in one visit. He was willing to pay the dentist’s full fee to avoid having to wear a temporary and go to a second appointment. Once the initial shock subsided, I realized just how desirable and compelling same-visit dentistry is for patients, prompting me to start investigating the digital workflow and same-visit crowns after 27 years of practicing traditional dentistry.
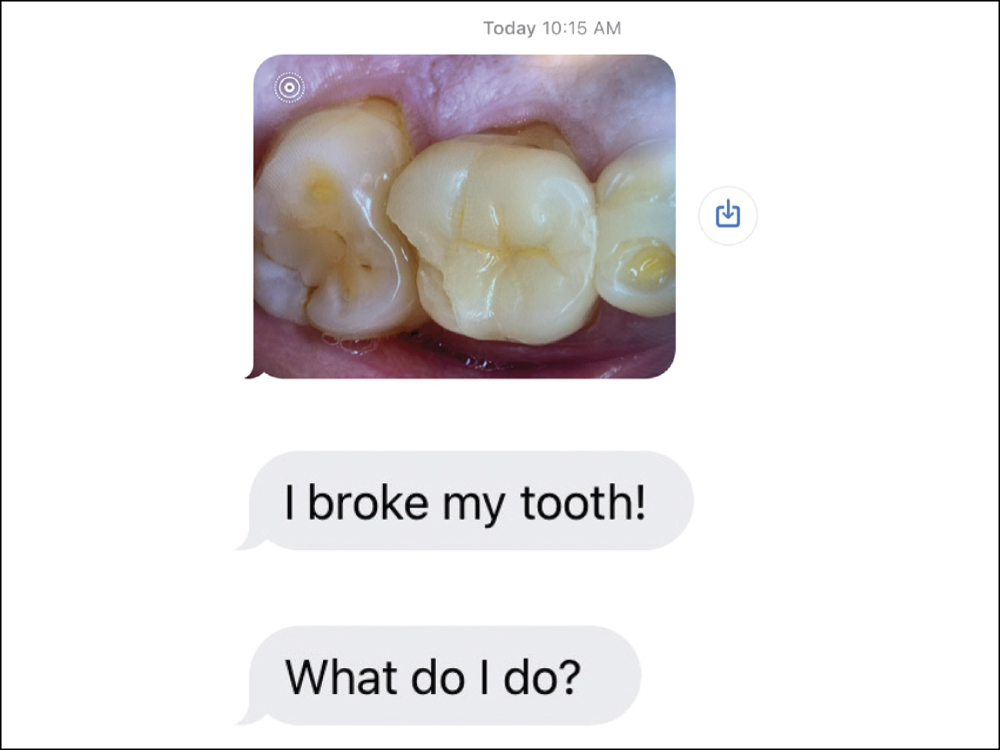
A message from my brother-in-law prompted my interest in a digital workflow.
BEGINNING MY DIGITAL JOURNEY
After years of watching digital technology from the sidelines, I decided it was time to develop my digital acumen. Very quickly, some important benefits became clear to me. In this article, I will discuss three cases in which I used a fully digital workflow, highlighting the efficiencies and benefits that come along with it.
CASE 1: A SEAMLESS WORKFLOW AND IN-OFFICE MILLING
The biggest and most apparent benefit to going digital is greater control of your workflow. Being able to fully manage how and when you make restorations without relying on lab time creates a much more personal process for both the doctor and patient.
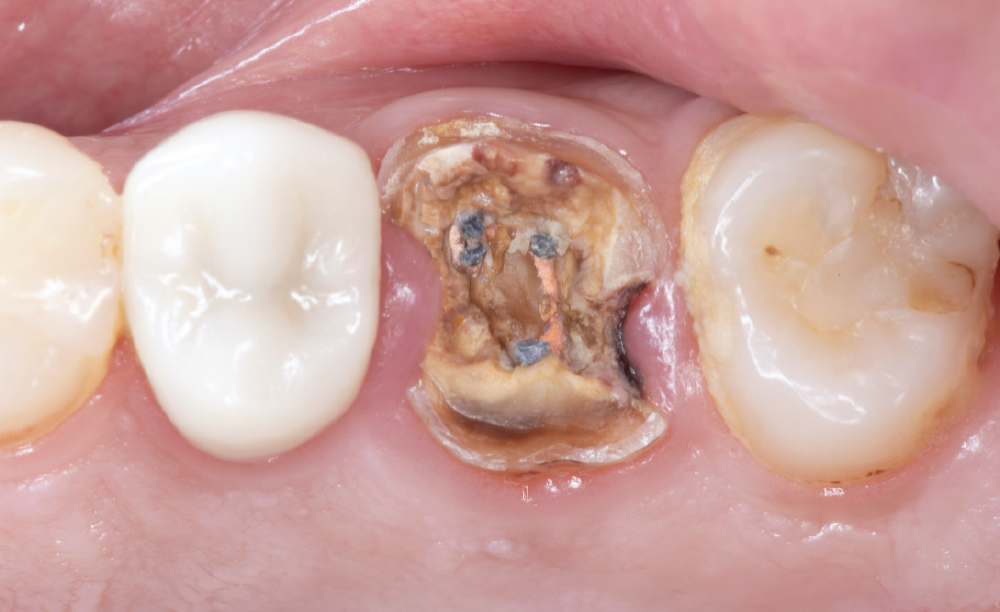
Figure 1: My first digital case was with a patient named Suzeanne, who presented with a broken crown on tooth #14, resulting in severe food traps, recurrent caries and gingival hypertrophy.
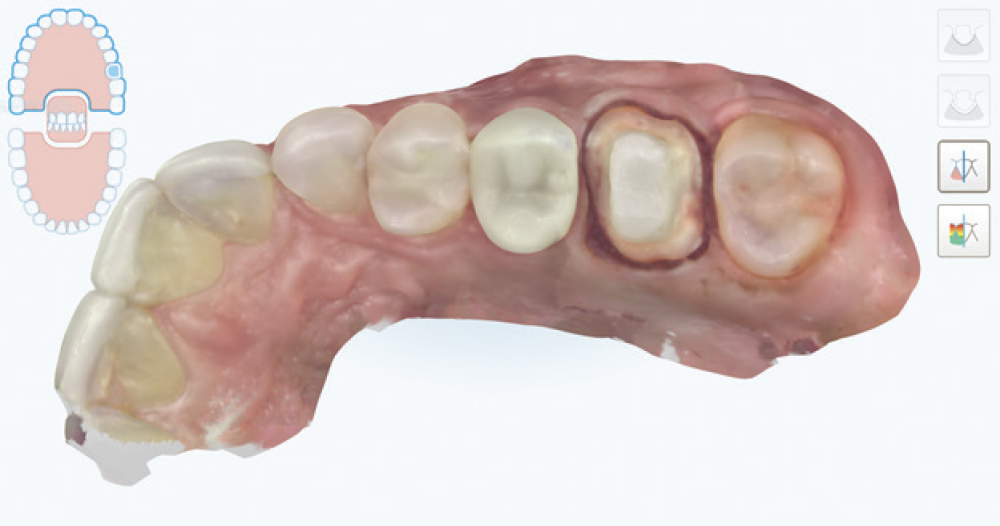
Figure 2: I removed the carious material, identified solid tooth structure for the margin and created a retentive buildup. I then used an intraoral scanner to take an impression of the tooth preparation. Using an iTero® Element scanner (Align Technology; San Jose, Calif.) gave me a real-time image of the preparation, making it easy to review for errors and confirm the scan.
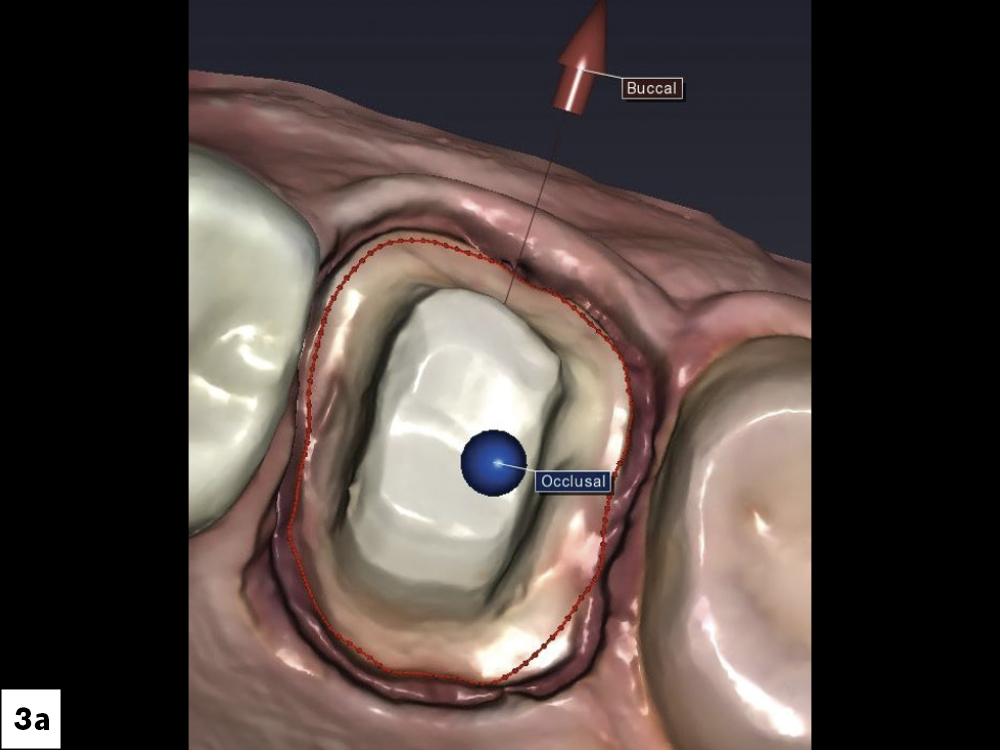
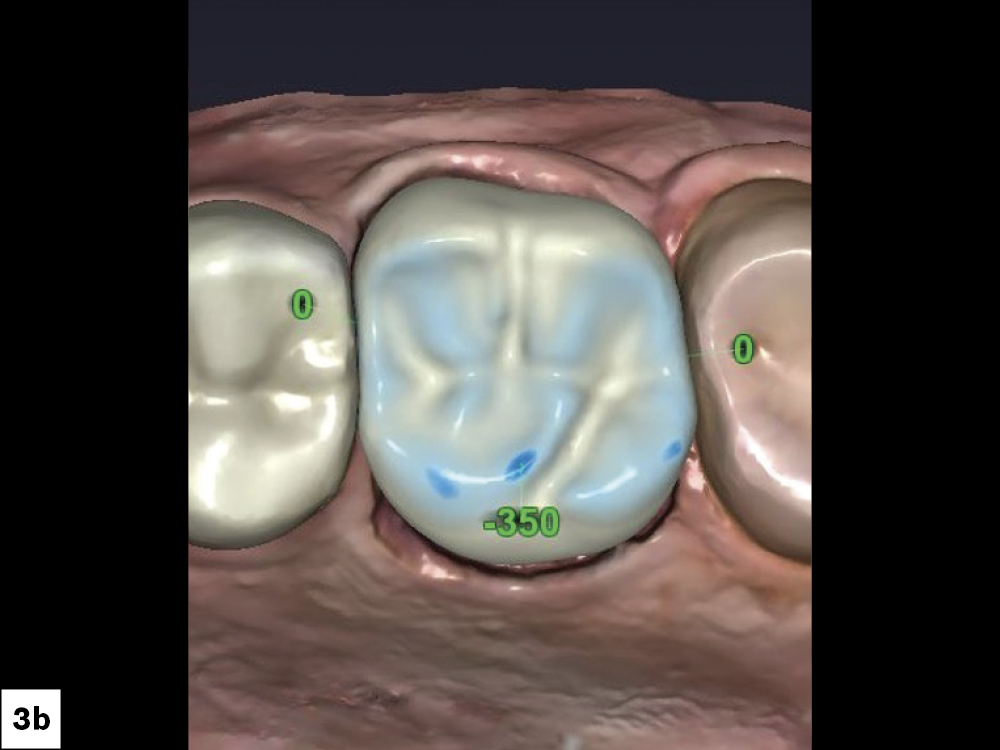
Figures 3a, 3b: After the scan was uploaded to the design sofware, a computer-generated outline (3a) of the margin was created, aided by artificial intelligence (AI). Next, I did a minor adjustment to the contact parameters and clicked to receive the final design. The design software then proposed a final crown design that could be further adjusted or approved for fabrication (3b). In this case, I used the fastdesign.io™ Software and Design Station from Glidewell.
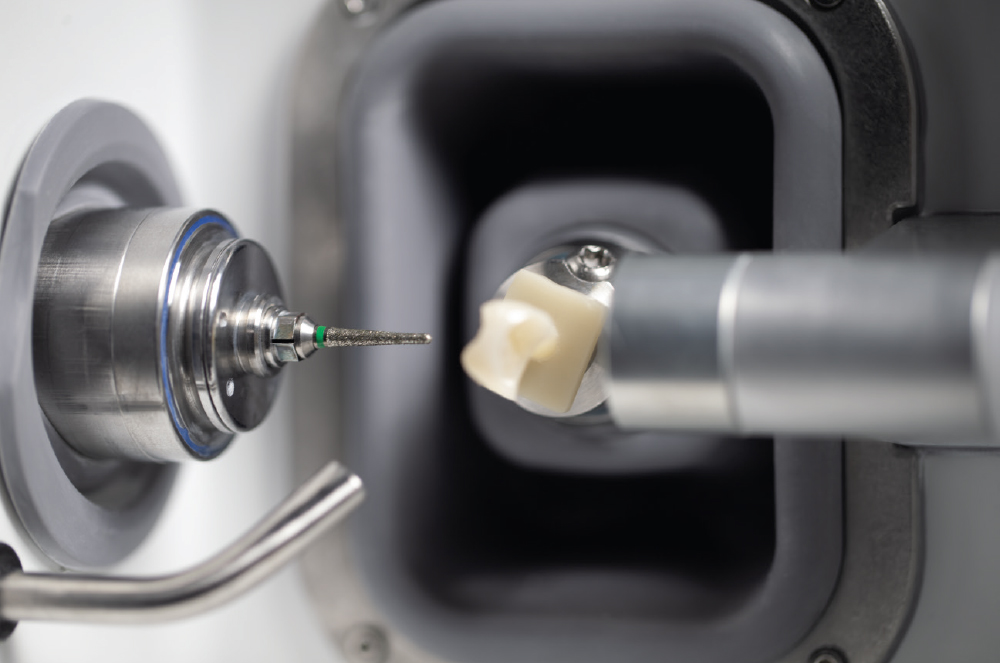
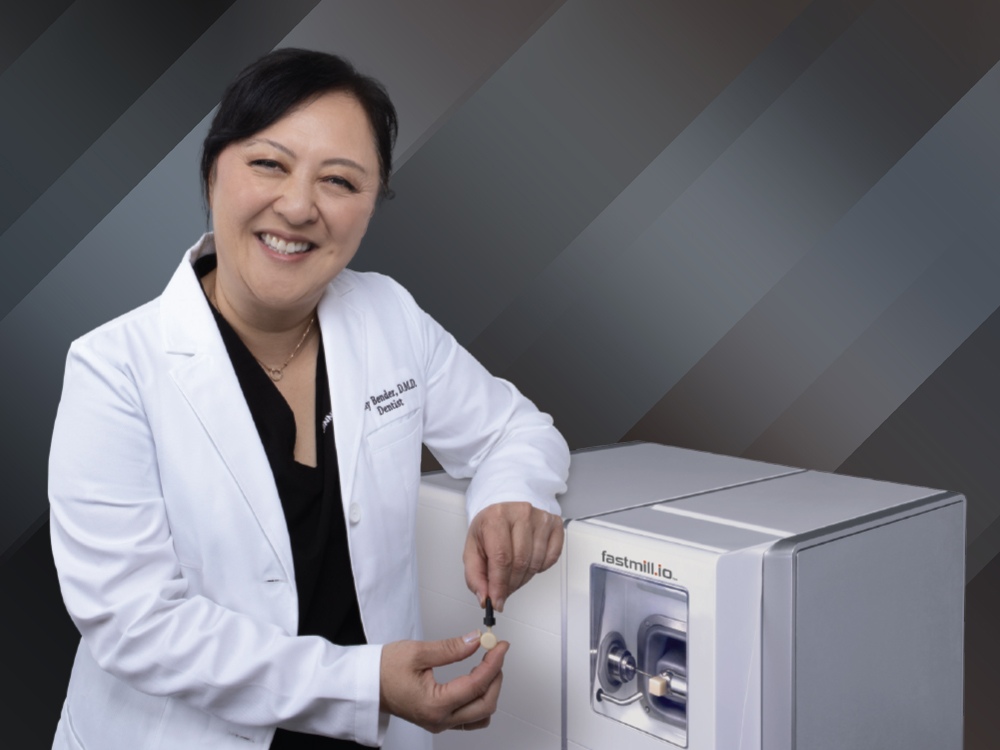
Figure 4: After confirming the design, I used the fastmill.io ™ In-Office Mill to fabricate the final restoration right in my office.
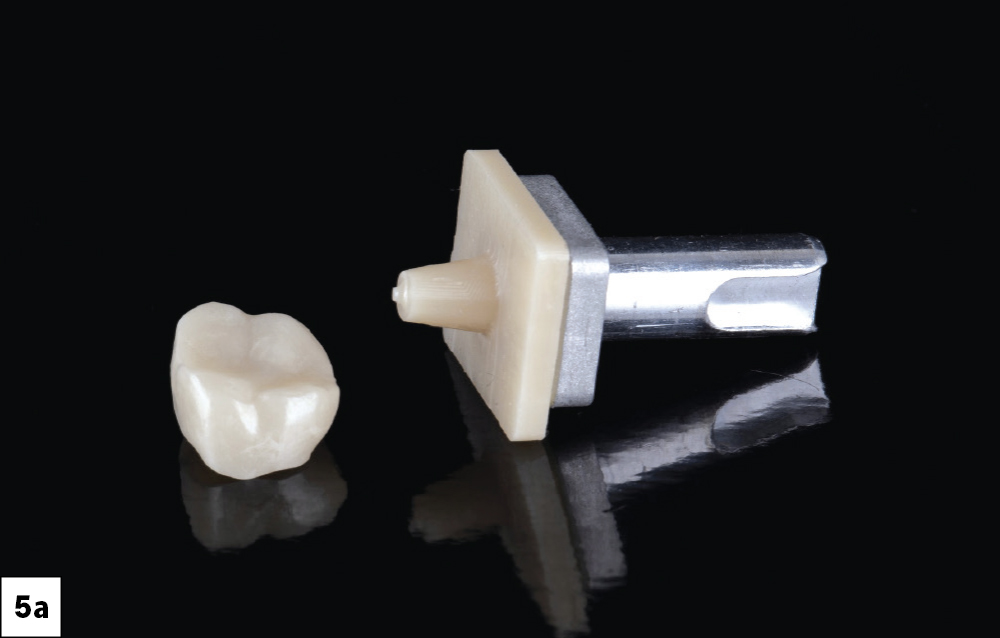
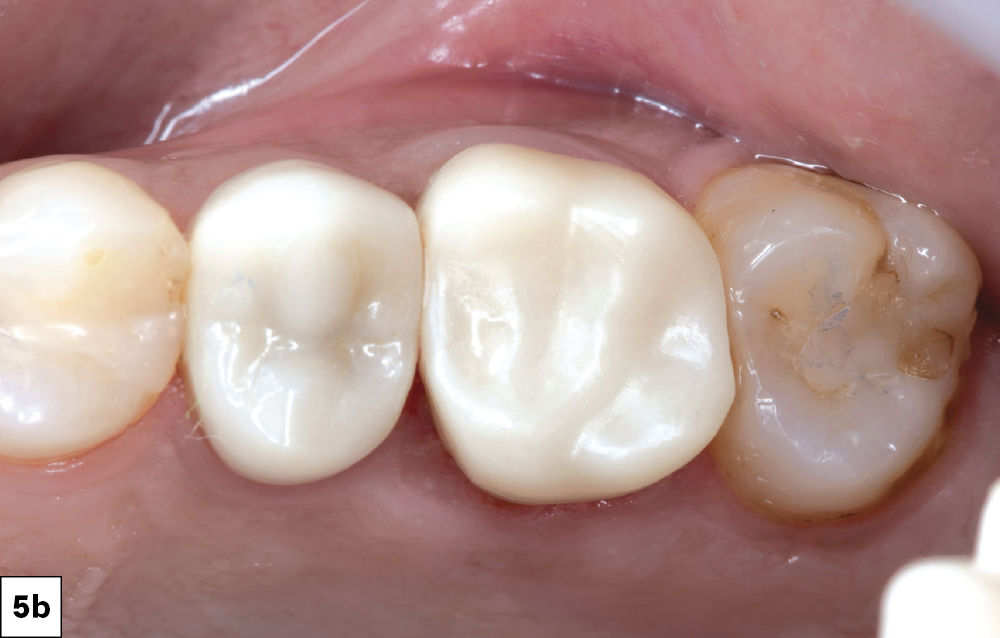
Figures 5a, 5b: I used BruxZir® NOW fully sintered zirconia, which provided the patient with a beautiful, long-lasting restoration. This workflow allowed me to treatment plan, design and deliver the restoration all in one appointment, giving me full control over the process from start to finish.
CASE 2: EASY ADJUSTMENTS AND LESS MATERIAL WASTE
I was pleased to learn that many of the common setbacks that we experience in restorative dentistry can be solved by adopting a digital workflow. In this next case, because I was using an intraoral scanner, I was able to rescan an incomplete impression and adjust a crown with little disruption to the patient. I was able to take multiple impressions without having to deal with “goopy” VPS material or discomforting my patient. Additionally, using an intraoral scanner has saved money on material costs.
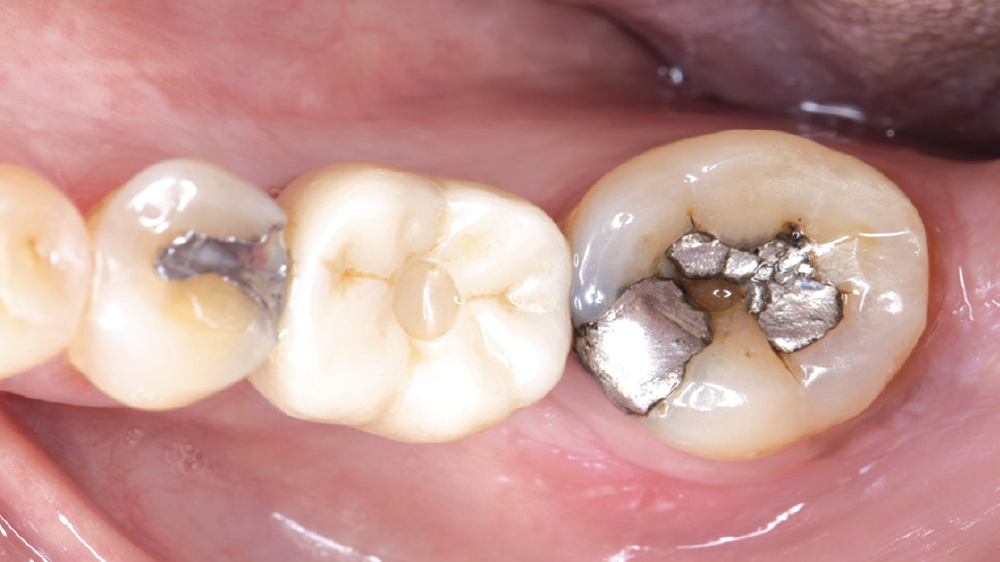
Figure 6: This patient presented with a fractured alloy restoration on tooth #18. The treatment plan was to fabricate a chairside conservative nanohybrid ceramic resin onlay using CAMouflage® NOW.
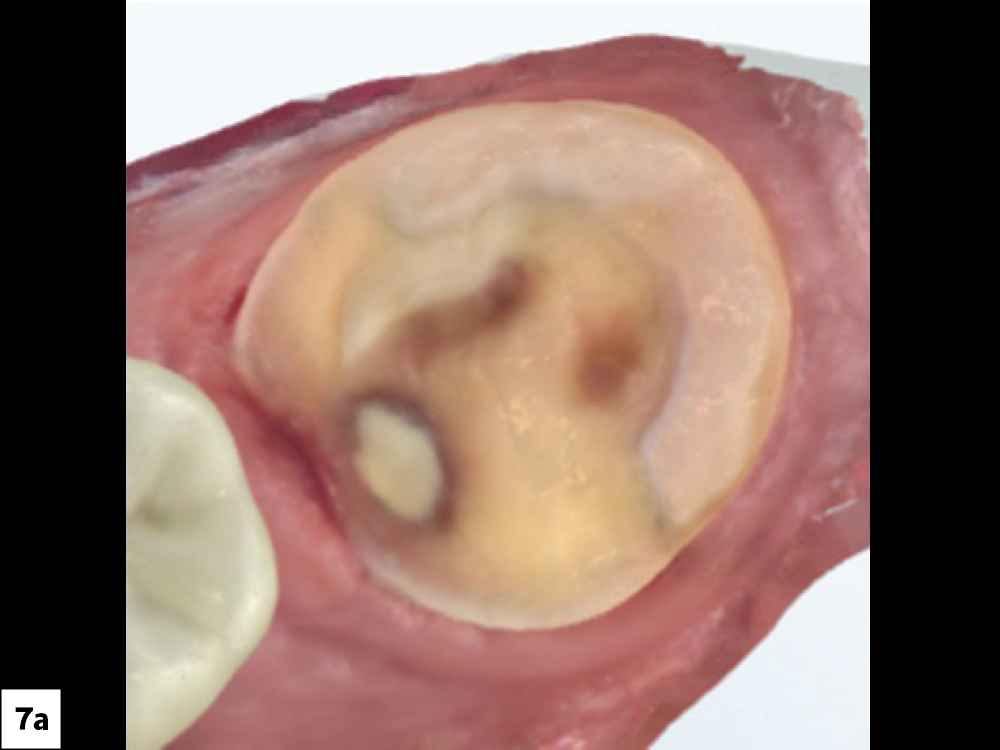
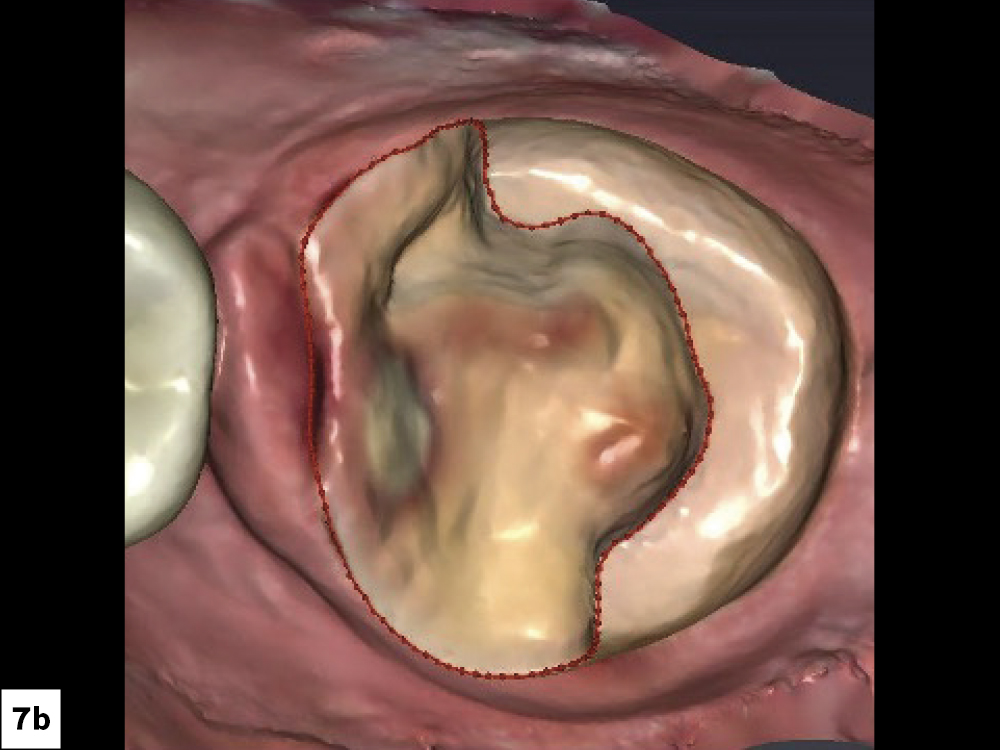
Figures 7a, 7b: After the first intraoral scan, I noticed that the margins were not well-defined. Normally a frustrating and time consuming issue, it was quickly taken care of and corrected for the patient. In order to get a more accurate scan of the margin, I performed a gingivectomy using a Waterlase laser (BIOLASE, Inc.; Irvine, Calif.) and used a double-cord technique with a size 0 cord to expose the margins. I then rescanned the area for a more accurate impression.
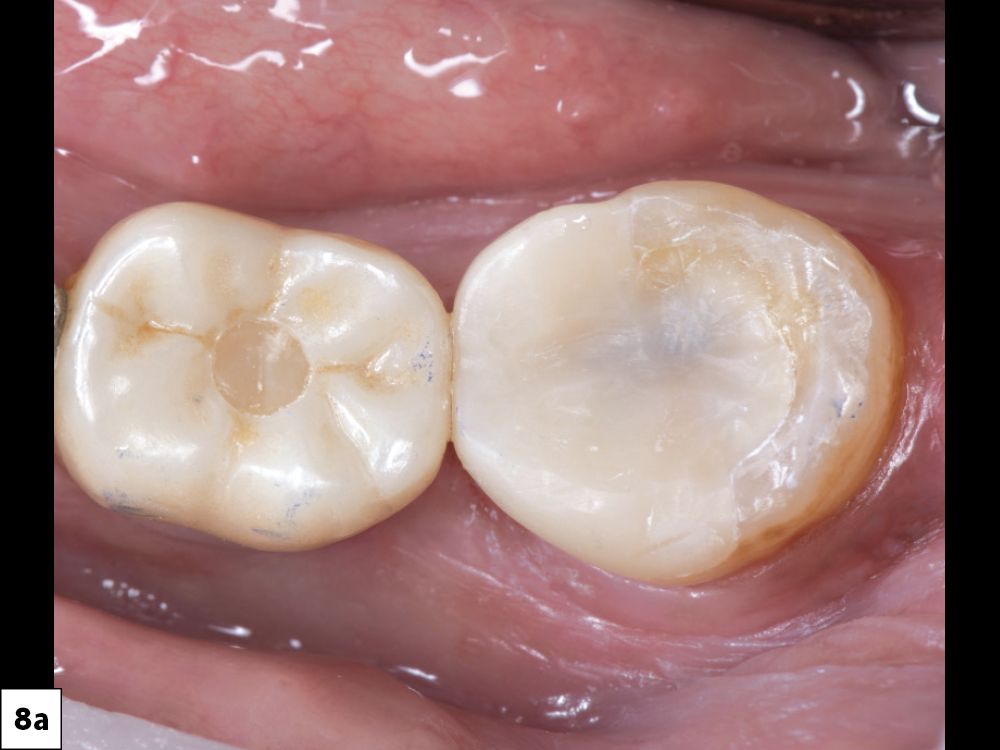
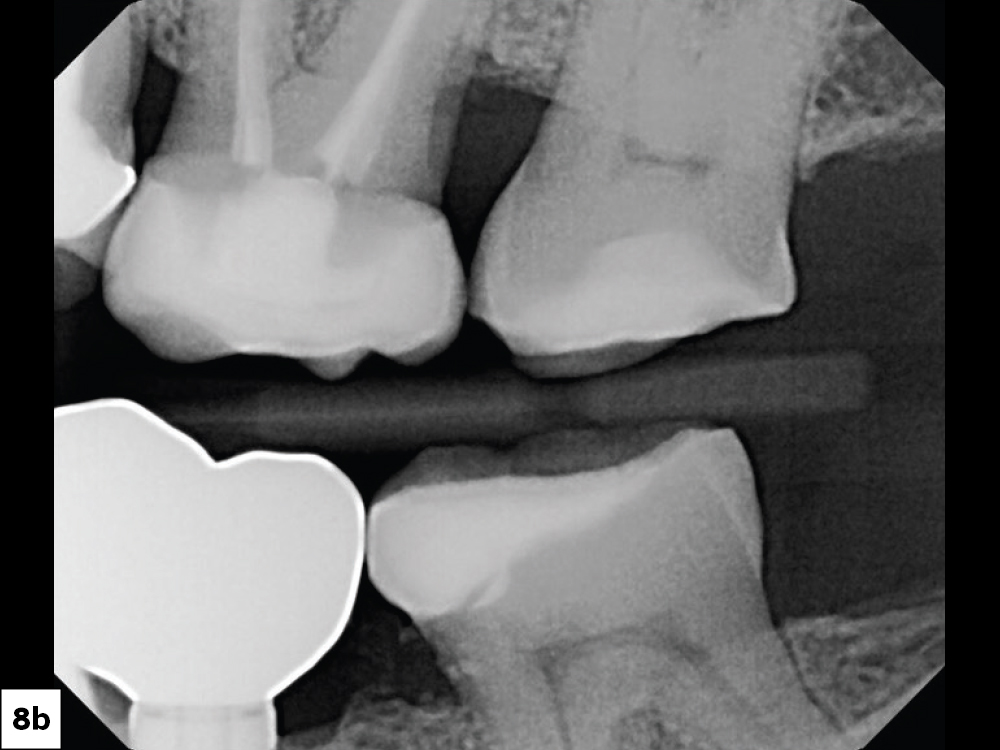
Figures 8a, 8b: Utilizing an intraoral scanner made the rescan quick and easy. The patient certainly appreciated not having two messy impressions in the same day, as would be the case in a traditional workflow. For complete confidence, I also confirmed the onlay’s fit radiographically, ensuring the patient could leave the office with a complete, esthetic restoration.
CASE 3: PATIENT ACCEPTANCE
A digital workflow is also a great way to make sure that your patients walk out of the office with natural-looking, esthetic provisionals.
The patient in this third case did not want the inconvenience of a poorly fitting temporary while we evaluated the endodontic condition and allowed the distal gingiva to heal. By utilizing a digital workflow and in-office milling, I delivered an esthetic solution using BioTemps® NOW. Providing her a comfortable provisional helped gain her confidence to move forward with definitive treatment, which was a BruxZir NOW crown, after gingival healing.
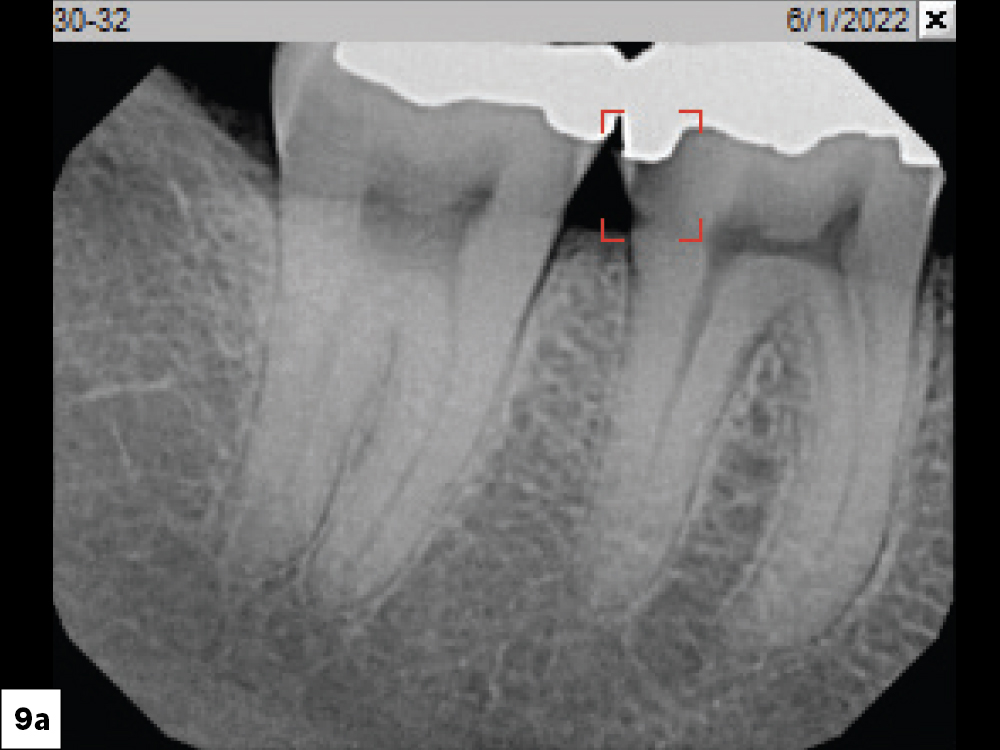
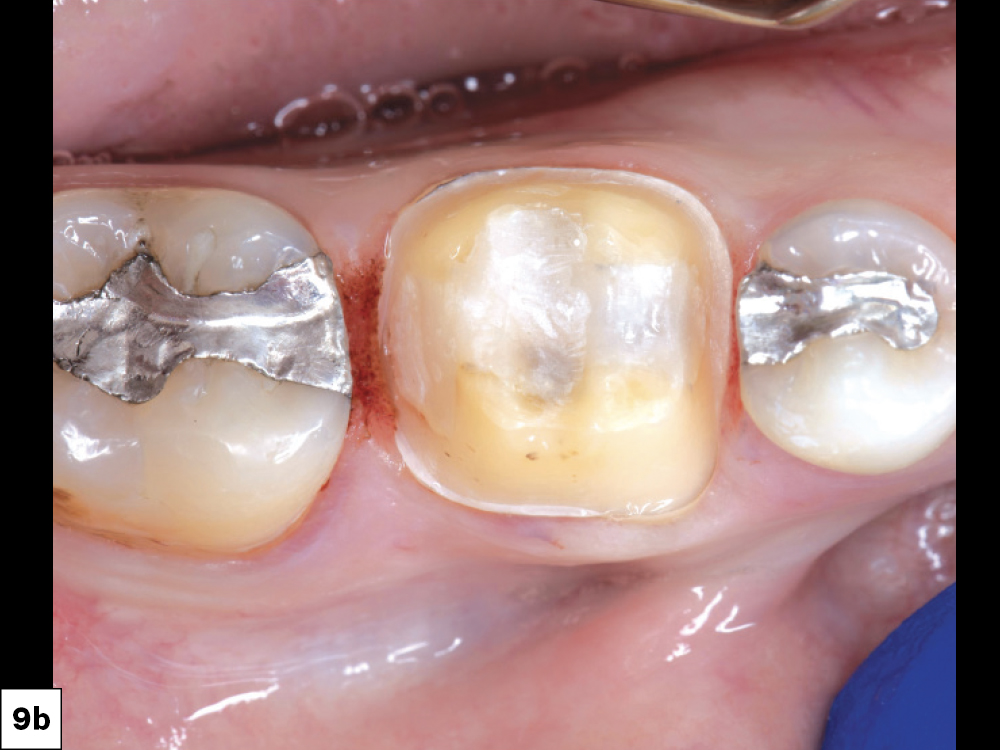
Figures 9a, 9b: This patient presented with a failing amalgam restoration on tooth #30, including food traps, recurrent caries and excessive bleeding upon probing the distal. The patient also complained of sensitivity to cold temperature (9a). After preparing the tooth for the crown, gingival inflammation on the distal where the caries progressed became more apparent (9b). Because of the damage, I knew it would be necessary to use a provisional to allow the gingival tissue to heal before seating a final restoration.
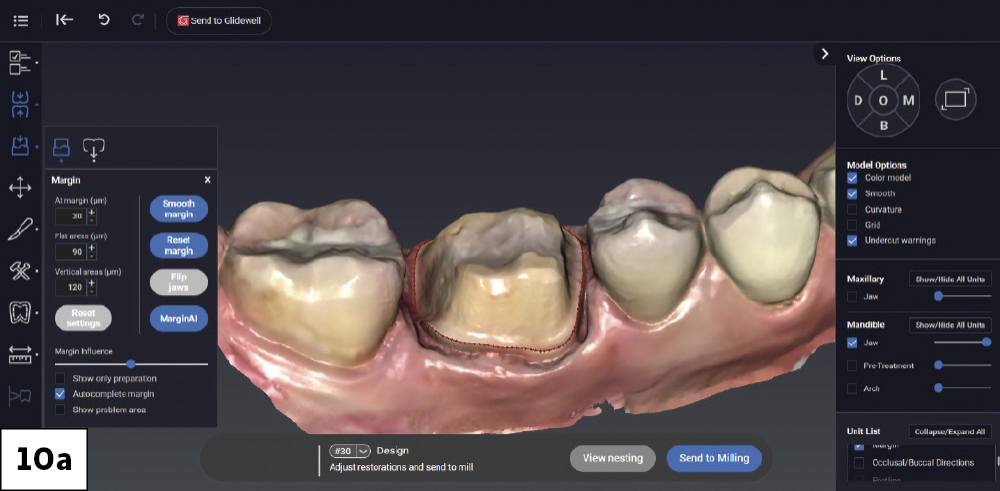
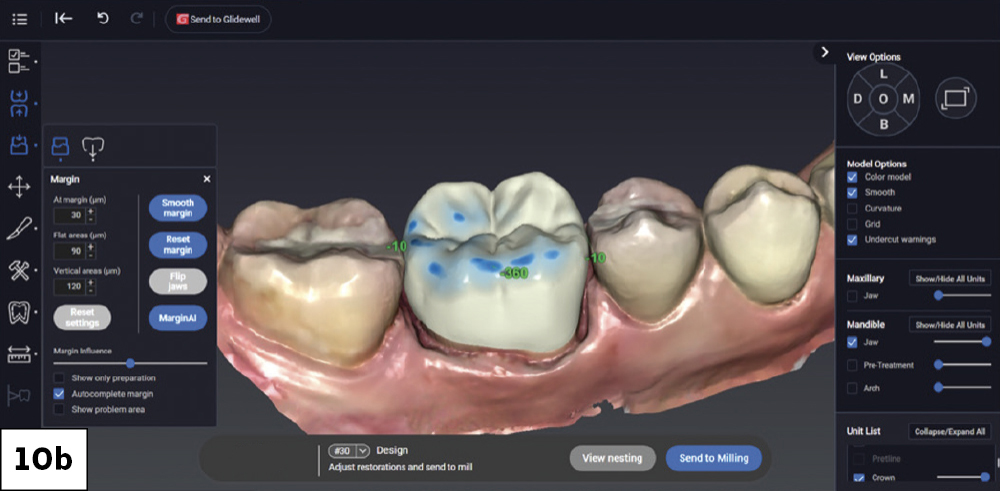
Figures 10a, 10b: After preparing the tooth, I took the digital impressions using an intraoral scanner and uploaded them to fastdesign.io for crown design. The design software generated the margin outline instantly, allowing me to confirm the shape with a single click (10a). Next, I designed the crown, giving me the ability to make any adjustments while allowing the patient to see the progress (10b).
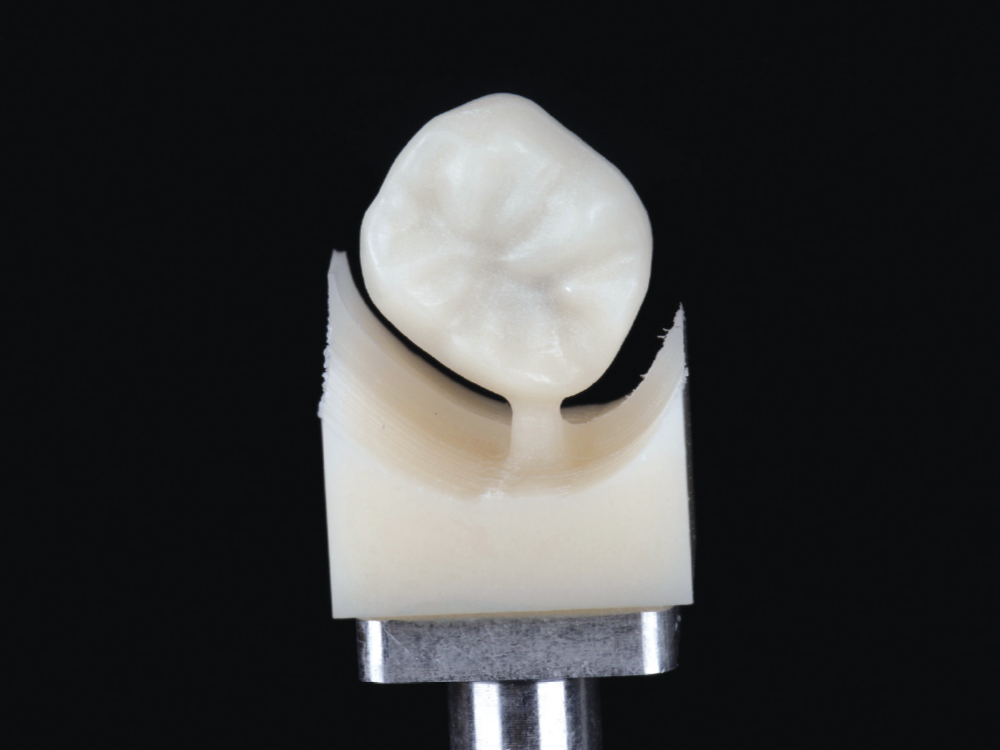
Figure 11: Using the same design as the crown, I milled a temporary crown using BioTemps NOW in less than 10 minutes. To seat, I air abraded the intaglio surface to create a better temporary bond and then applied Temp-Bond™ Clear cement (Kerr Corporation; Brea, Calif.). After seating the provisional and checking the margins, contacts and occlusion, as well as the comfort of the patient, I was able to confirm the crown design. This verified crown design would be reused for the patient’s final crown.
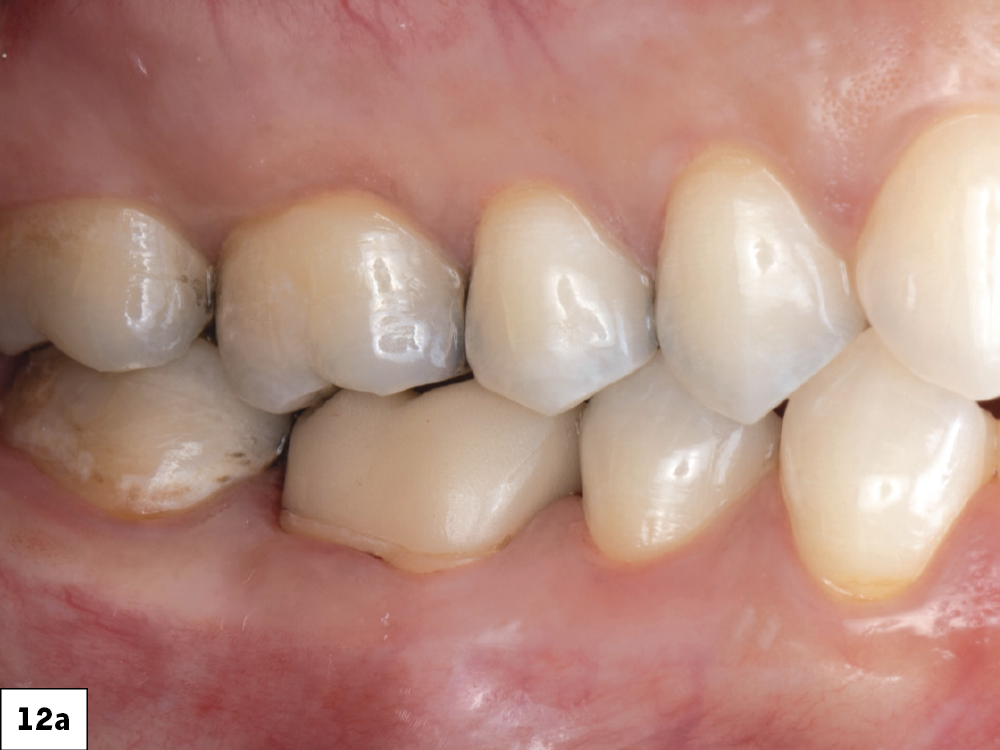
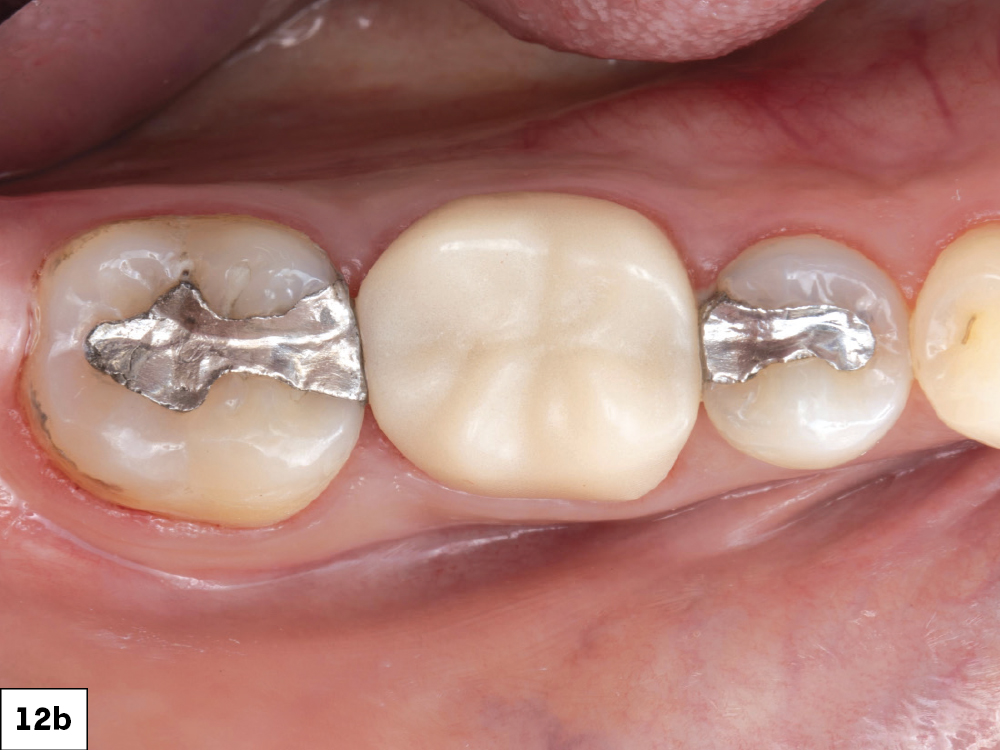
Figures 12a, 12b: I was able to create a treatment plan, prepare the crown site, and design and mill a temporary solution for my patient in one visit, allowing her to walk out of the office with a functional, esthetic provisional. The fully digital workflow helped me gain the patient’s confidence by treating her chief concerns while I customized the contacts and margin parameters of the provisional for a great seal.
CONCLUSION
These three cases offer a look at some of the benefits of digital dentistry — showing how it can streamline workflow, offer greater flexibility when things don’t go according to plan and increase patient acceptance. Taking the first step to a digital workflow can be challenging, but starting with a scanner and working toward an in-office mill and same-visit practice can yield immediate dividends. Speaking as someone who took the leap to a digital workflow after 27 years of practicing traditional dentistry, I’m certain that adopting a digital model was one of the best decisions I’ve made. It has reinvigorated my practice. I think digital dentistry is worth investigating for every dentist.
Are you considering making the leap to digital dentistry? Click here to watch Dr. Bender’s webinar recording to learn more about the pros and cons.